Blooming Beauties: A Guide to Growing Azaleas

by VickiS

My mother-in-law passed away many years ago. One of the plants sent to her funeral was a small vividly pink azalea, which I planted at our lake cottage near where my in-laws lived. That plant is now 4 1/2 feet tall and 3 feet across — producing beautiful flowers every spring (see above). I’ve done absolutely nothing to it to help with this wonderful growth, and it even had to be transplanted once when we put in a new driveway.

I mention this as an introduction to my home garden that has a small, struggling azalea that refuses to grow or bloom. Because I did nothing to earn the beautiful blooms on the first one, I adopted the same strategy for the second — which was to stick it in the ground and ignore it. Clearly I made a mistake and have now done research to find out what I need to do to save and nourish this little beauty.

Apparently, cultivating these exquisite shrubs requires attention to soil quality, companion planting strategies, and proper fertilization techniques.

Soil Information: Azaleas thrive in well-drained, acidic soil with a pH range between 4.5 and 6.0. Before planting, it’s crucial to amend the soil to meet these requirements. Incorporating organic matter such as compost, pine bark, or peat moss helps improve drainage and acidity levels. Additionally, ensure the planting site has good air circulation to prevent waterlogging, which can lead to root rot.

Companion Plants: Strategic companion planting can enhance the health and aesthetic appeal of your azalea garden. Consider incorporating shade-loving perennials like hostas, ferns, and heucheras to create a harmonious understory beneath the azalea’s canopy. These plants not only complement the azaleas visually but also provide additional texture and color contrasts. Moreover, choosing plants with similar soil and moisture requirements can simplify maintenance and promote overall garden health.

Fertilizer: Proper fertilization is essential for encouraging robust growth and prolific blooming in azaleas. Apply a balanced, slow-release fertilizer formulated for acid-loving plants in early spring, just before new growth emerges. Avoid fertilizers high in phosphorus, as excessive phosphorus levels can hinder the uptake of essential nutrients like iron, leading to nutrient deficiencies and yellowing leaves. Follow the manufacturer’s instructions for application rates and frequency, and water thoroughly after fertilizing to ensure proper nutrient absorption.

So, I now have a plan and I’m looking forward to working through this challenge so I can post photos of my newly energized azalea next spring!

Reviving Your Wisconsin Lawn: A Guide to Overseeding in Spring

by VickiS

Springtime in Wisconsin is a time of renewal, and your lawn is no exception. If your once-lush grass has seen better days, overseeding could be the solution to rejuvenating your yard’s greenery. This guide will walk you through the steps of overseeding your lawn in spring, focusing on the essential soil preparation necessary for success.

Understanding Overseeding:
Overseeding involves spreading grass seed over an existing lawn to fill in thin areas, improve density, and introduce new grass varieties. In Wisconsin, where winters can be harsh and summers humid, overseeding in spring helps repair winter damage and fortify your lawn for the upcoming growing season.

Soil Preparation:

  1. Assess Your Lawn: Begin by assessing the current state of your lawn. Identify thin or bare patches, areas with poor grass growth, and any signs of compaction.
  2. Mow the Lawn: Before starting any soil preparation, mow your lawn to a height of around 1.5 to 2 inches. This step ensures that the grass is at an optimal length for overseeding and allows the new seed to reach the soil surface.
  3. Dethatching: If your lawn has a layer of thatch (accumulated dead grass and debris), consider dethatching to improve seed-to-soil contact. Use a dethatching rake or a specialized dethatching machine for larger areas.
  4. Aeration: Compacted soil can hinder grass growth by restricting root development and water penetration. Core aeration helps alleviate compaction by removing small plugs of soil, allowing air, water, and nutrients to reach the grassroots. Rent an aerator or hire a professional service for this task.
  5. Soil Testing: Test your soil’s pH level and nutrient content using a soil test kit or by sending samples to a local agricultural extension office. Based on the results, amend the soil with lime to raise pH or with specific fertilizers to address nutrient deficiencies.
  6. Soil Amendments: Incorporate organic matter such as compost or well-rotted manure into the soil. This enriches the soil, improves its structure, and provides a favorable environment for seed germination and root growth. Spread a thin layer (about ¼ inch) of compost evenly over the lawn and rake it into the soil.
  7. Leveling: Fill in low spots and level the soil surface using a lawn roller or a leveling rake. A smooth, even surface promotes uniform seed distribution and ensures consistent watering.

Overseeding:

  1. Choose the Right Seed: Select grass seed varieties that are well-suited to Wisconsin’s climate and soil conditions. Cool-season grasses like Kentucky bluegrass, fine fescue, and perennial ryegrass thrive in the region’s temperate climate.
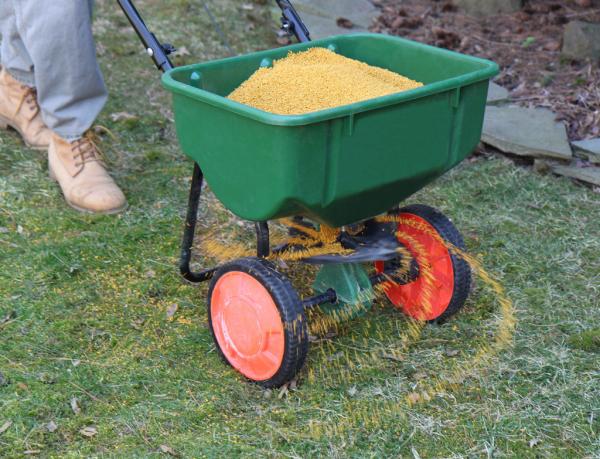
  2. Seed Application: Use a broadcast spreader or a handheld spreader to evenly distribute the grass seed over the prepared soil surface. Follow the seeding rate recommended for your chosen grass species.
  3. Seed-to-Soil Contact: After seeding, lightly rake the soil to ensure good seed-to-soil contact. This helps anchor the seeds and promotes germination.
  4. Watering: Keep the seeded area consistently moist, but not waterlogged, to support germination and seedling establishment. Water lightly multiple times a day, especially in dry or windy conditions.
  5. Fertilization: Apply a starter fertilizer specially formulated for new seedlings to provide essential nutrients for growth. Follow the manufacturer’s instructions for application rates and timing.
  6. Mulching (Optional): Consider applying a thin layer of straw or mulch over the seeded area to retain soil moisture and protect the seeds from birds and harsh weather conditions.

Maintenance:

  1. Regular Watering: Maintain consistent soil moisture until the new grass is well-established, typically within 4-6 weeks after seeding.
  2. Mowing: Once the new grass reaches a height of 3 inches, mow it to a height of around 2 inches. Avoid cutting more than one-third of the grass blade length at a time to prevent stress.
  3. Fertilization and Weed Control: Follow a regular fertilization schedule and address any weed issues as needed to promote a healthy, dense lawn.

By following these steps for soil preparation and overseeding, you can breathe new life into your Wisconsin lawn and enjoy a lush, vibrant carpet of grass throughout the spring and summer months. Remember that patience and consistent care are key to achieving long-lasting results.

Spring into Action: Essential Tips to Prepare Your Garden in April

by VickiS

April marks the true awakening of nature after the winter slumber. It’s the time when your garden comes alive with vibrant colors, new growth, and the promise of a fruitful season ahead. To make the most of this transition, here are some essential tips to prepare your garden for the months ahead:

1. Clean Up: Start by clearing away any debris that has accumulated over the winter months. Remove dead leaves, branches, and any other debris that might harbor pests or diseases. This will help to create a clean canvas for your garden to thrive.

2. Pruning: April is the perfect time to prune shrubs, trees, and bushes. Remove any dead or diseased branches to encourage new growth. Shape your plants as needed to promote healthy growth and enhance the overall appearance of your garden.

3. Soil Preparation: Take the time to prepare your soil for planting. Loosen compacted soil with a garden fork or tiller and add organic matter such as compost or aged manure to improve soil structure and fertility. This will provide a nutrient-rich environment for your plants to thrive.

4. Plant Cool-Season Vegetables: April is the ideal time to plant cool-season vegetables such as lettuce, spinach, carrots, and peas. These crops thrive in cooler temperatures and will provide an abundant harvest before the summer heat sets in.

5. Start Seeds Indoors: Get a head start on your summer garden by starting seeds indoors. Tomatoes, peppers, and eggplants can be started indoors in April and transplanted outdoors once the weather warms up. Use seed trays or small pots filled with a quality seed-starting mix for best results.

6. Divide Perennials: Spring is the perfect time to divide and transplant overcrowded perennial plants. Dig up clumps of perennials such as hostas, daylilies, and irises, and divide them into smaller sections. Replant the divisions in other areas of your garden or share them with friends and neighbors.

7. Mulch: Apply a layer of mulch to your garden beds to help retain moisture, suppress weeds, and regulate soil temperature. Use organic mulches such as shredded leaves, straw, or bark chips for best results.

8. Pest Control: Keep an eye out for early signs of pest infestations and take action promptly. Handpick pests such as aphids or use organic pest control methods such as neem oil or insecticidal soap to keep them in check.

9. Watering: As the weather warms up, be sure to water your garden regularly, especially newly planted seeds and transplants. Water deeply and thoroughly to encourage deep root growth and drought tolerance.

10. Enjoy the Beauty: Finally, take the time to simply enjoy the beauty of your garden in April. Take a leisurely stroll, breathe in the fresh air, and marvel at the wonders of nature as it comes to life once again.

By following these essential tips, you can ensure that your garden is primed and ready for the growing season ahead. With proper care and attention, your garden will flourish and provide you with beauty, bounty, and joy throughout the spring and summer months.

Garden Year Round with an Underground Greenhouse

article and photograph from The Seed Guy https://www.facebook.com/theseedguy

If eating Fresh Vegetables and Fruits Year Round is important to You and Your Family, you might consider building an Underground Greenhouse. It will keep the temperatures warmer in the Winter and help prevent overheating in the Summer; making it possible to grow your garden vegetables year round.

For the vast majority of the country, 4 feet below the surface will stay between 50° to 60°F even if the weather above the ground gets to 10°F or colder. This is what they call the thermal constant, and what the Underground Greenhouse is based on.

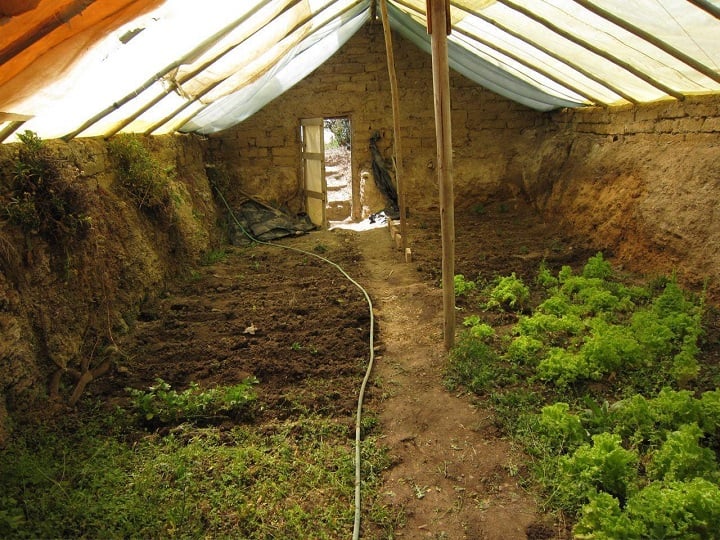
The original design for an Underground Greenhouse was invented in Bolivia, and was called a Walipini, an Aymara Indian word which means “a warm place.” A Walipini is a rectangular shaped Greenhouse that is dug down 6-8 feet deep in the ground. The longest area of the rectangle will face towards the south (in the Northern Hemisphere) to take advantage of the most sunlight.

The design of the Underground Greenhouse isn’t that complicated, as it can be as simple as a hole with plastic sheets laid on top. The roof seals in the heat and insulates the area to keep a warm, moist environment for your fruits and vegetables.

The location of your Walipini will depend on how big you want it to be. You’ll need enough space to grow your plants and have a small area to walk into your greenhouse. The bottom of the Greenhouse will need to be at least 5 feet above the water table in your area. The recommended size for an Underground Greenhouse is 8 x 12 feet.

When planning where your Greenhouse will be located, remember that your roof will need to receive light during the winter, also. This means that you will have to make sure that trees or buildings don’t block it during the winter time when the sun is in the South. In most cases, your Underground Greenhouse should be set up East to West, with the roof facing South to take advantage of the Winter Sun.

Once it’s decided where your Underground Greenhouse will be located, you can start digging. Plot out the area above ground to keep track of where you should be digging. While you’re excavating, dig at least 2 feet deeper than your desired depth. Keep your soil close by to help prop up the roof.

The walls of your Underground Greenhouse should have a minimum 6-inch slope from the roof to the floor. This will greatly reduce the amount of crumbling and caving that will occur with the soil. You can also layer the walls with a clay to prevent erosion, or use bricks to stabilize the walls of the building.

While you’re digging the hole, dig an extra 2 feet below the desired depth. You’ll fill this area with stone or gravel and then 8 inches of soil. Ideally, you’d lay larger stones and gravel on the bottom layer and the gravel would become progressively smaller until you reach the soil.

The bottom of the greenhouse should be slightly sloped from the center to the edges. Along the perimeter, you should leave a space of 2-3 feet just filled with gravel. This is designed to help the water drain more easily. Many people have also created open gravel wells in the corners of the greenhouses that allows them to collect the water. This will allow you to draw a bucket into the hole and pull out water if you find you have too much.

Once the floor is filled in with the drainage system, and the soil required for growing, the doors can be installed. Place the door frame at the base of the ramp and fill in the areas around the door as much as possible with dirt and clay. Filling in these gaps will prevent heat loss in your greenhouse.

Many times, people will use 2-inch door frames that have holes drilled into the top middle and bottom of each side. They will then use wooden stakes, dowels or rebar to secure the door frame into the soil wall.

The angle of the roof will make a big difference on the sun’s ability to heat your greenhouse. Ideally, the roof should be facing directly at the winter solstice at a 90 angle. This angle will maximize the heat during the winter solstice and minimize the heat during the summer solstice.

Now, you can use that extra soil that you have left over to create a berm. The berm is basically an extension of the north wall of the greenhouse. This allows you to control the angle of the roof by adding or taking away dirt. Build up the berm to continue the slope that you used on the wall. If you’re using bricks – continue using them on the berm.

The most economical, durable material for your roof is 4-inch PVC pipe. Using PVC elbow pieces, joiners, etc, you can create a flat roof frame that will cover your Underground Greenhouse.

After you’ve created a PVC frame, lay it in place on the top of your hole. Then lay plastic sheeting across the top of the frame and make sure that it extends past the edge of the frame by at least 1 foot. This flap will prevent run off water from the roof from running back into the greenhouse itself.

Once the plastic material is put on top of the roof frame, move inside and tack another layer of plastic wrap along the inside of the roof frame. This internal plastic sheeting will create a 4-inch barrier between the inside and outside of the roof, and will act as an insulator that will keep the heat in more effectively.

You’ll want to make sure that you leave a few inches of plastic hanging down on the lower (south) end of your roof. This will force moisture that collects on the roof to drip off above the drainage system or on top of your plants instead of at the base of the roof. If you allow the moisture to run to the base of the roof frame, it may affect the soil at that location and break down your wall, etc.

Ventilation is always crucial. You have 3 options, such as: Installing two doors, one at each end; installing a vent roughly the size of the door at the top of the back wall; or installing a chimney at the center of the back wall. Good Luck on your Greenhouse.